With the advent of .NET 5 the ability to run Content Management systems like Umbraco on other operating systems is now pretty trivial. There are a few hoops to jump through but I hope to help guide you through these in this article. Any snippets you see need to be run in a terminal window.
Setting up the tools
The first thing you'll want to do is set your development environment up - and here you have 3 choices. Visual studio 2019, or 2022, Visual studio Code or Jetbrains Rider. I personally prefer regular old Visual Studio, but any of these will work.
Once your IDE is installed, you will need to install the .NET SDK. Visual Studio will install this for you as part of the install, but if you need to install it manually, there are instructions on the .NET SDK site.
The final tools you'll need on a mac are something to connect to the database, since Sql Management studio isn't supported yet. There are 2 options I've found that are awesome :- Azure Data Studio and Sql Server VS Code Extension.
It's Database time
The next thing you'll need is a database server to connect to - and your options here are either a network database server, a virtual machine or Docker, which I will be using in this guide. First download and install the latest version of Docker installer. There's two options, one for Intel based macs, and one for the newer ones with the M1 ARM based chips. This will have an impact on future decisions, so it's important to know which you have.
There are a couple of quick tests you can do to make sure you have set everything up correctly. If you open a terminal window and type in these two commands you should get feedback that things are working correctly
dotnet --info
docker info
Once you're all setup and good to go, you need a sql server image. I have chosen the SQL Server 2017 image since it's all I need, but sql 2019 would work just as well. It's important to note this image will only work on Intel based chips.
docker pull mcr.microsoft.com/mssql/server:2017-latest
If you have an M1 based mac, you will need to use the Azure SQL Edge sql image
docker pull mcr.microsoft.com/azure-sql-edge
Once you have the latest image you will want to create an instance of the container. Here I'm using Sql 2017, so if you want to use a different edition, please make sure you change the relevant section. As a quick side note, you can actually just run the below steps without needing to download the image first, since if it can't find the image, it'll download it at that time.
docker run -d --name sql_server -e 'ACCEPT_EULA=Y' -e 'SA_PASSWORD=MySuperSecurePa$$word!' -p 1433:1433 mcr.microsoft.com/mssql/server:2017-latest
To break down what's happening here, we're running docker with the -d flag, which allows you to run the container in detached mode, so you can close the terminal once it's running. The rest of the settings pertain to the Name of the container, the sa Password, which needs to pass the security requirements of SQL server, and the name of the image you want to use.
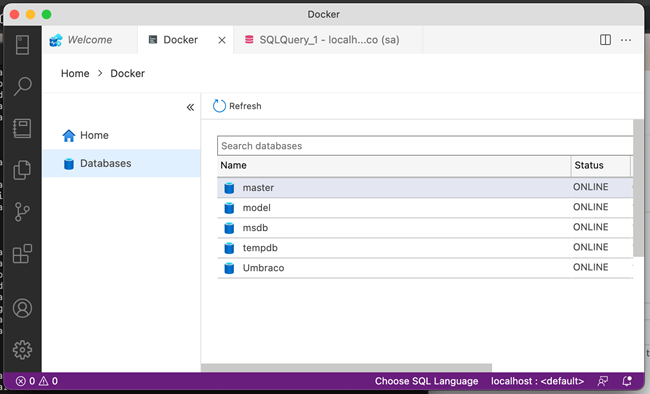
One thing to bear in mind, during the Umbraco installation is that you will need to have created the database beforehand, so use one of the tools from earlier to create your DB on your docker instance. You can connect via localhost or 127.0.0.1 with the sa user and the password you defined.
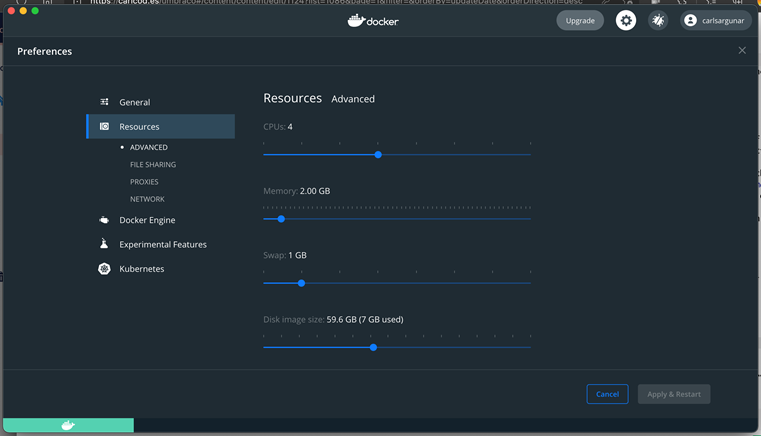
To boost performance, you may want to tweak the settings for Docker, I limited the memory usage to 2GB to keep the impact on my system low, since this is a dev environment
Umbraco is a go!
Ok - everything's ready to go, time to set up the site. The next part of the setup Umbraco using the current latest instructions. Note : Umbraco 9 will be released on the 28th of September, so after this date I'll update the instructions.
Current Latest instructions taken from the Release Candidate 3 page. First install the template :
dotnet new --install Umbraco.Templates::9.0.0-rc003
Nearly there - just got to set the Umbraco project up. I've decided to call mine UmbraMac
dotnet new umbraco -n UmbraMac
Let that do it's thing, and when it's finished you have a new Umbraco site which you can open in visual studio code or full visual studio. The process creates a csProj file which you can open directly, or you can browse to the folder and type the following to open Vs Code
    cd UmbraMac
    code .
In Visual Studio you can open the csProj and just hit Run, or in code you can type
dotnet run
Go through the normal set-up process, again choosing SQL Server and your Umbraco Database by connecting to Localhost and entering the name of the database you chose. As an alternative you could also edit the appsettings.json and adding a connectionstring.
    {
      "$schema": "./umbraco/config/appsettings-schema.json",
      "Serilog": {
        "MinimumLevel": {
          "Default": "Information",
          "Override": {
            "Microsoft": "Warning",
            "Microsoft.Hosting.Lifetime": "Information",
            "System": "Warning"
          }
        }
      },
      "ConnectionStrings": {
        "umbracoDbDSN": "server=localhost;database=Umbraco;user id=sa;password='MySuperSecurePa$$word!'"
      },
      "Umbraco": {
        "CMS": {
          "Hosting": {
            "Debug": false
          },
          "Global": {
            "Id": "4e0dff75-df34-47dd-b0f9-877be2961ce4"
          }
        }
      }
    }
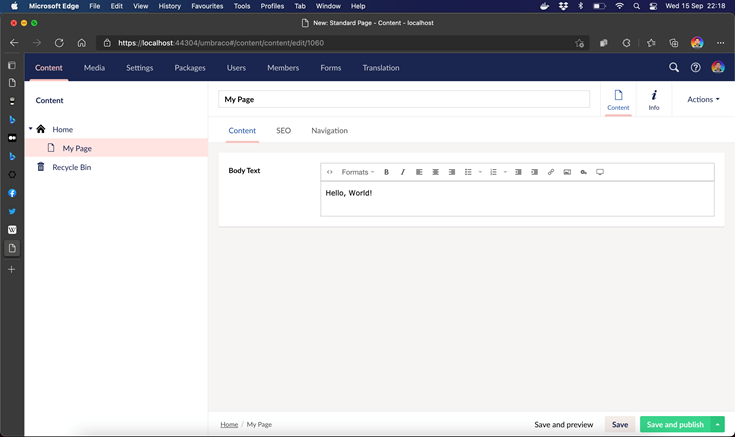
And that's it! Umbraco-a-go-go! And Look! Tabs!!! Tabs are back!
Helpful Docker commands
Whilst writing this, I ran into a few debugging issues so there are a few super useful docker commands which helped me navigate my way around. A lot of these can also be found by using the Docker desktop app, but it's good to have choices
To list all running containers. This will let you see the ID which can be used when doing other things on these
docker ps -a
To see the logs for a container. This was super helpful - the first time I set up SQL server I spotted the container kept stopping as soon as it started. Running this command I was able to find out I'd used too simple a password and could start again with a more complex one.
docker logs [containerId]
As always, any feedback appreciated. Happy hacking :-)